Garbage Disposer

Garbage Disposer Parts, Accessories & Repair Help


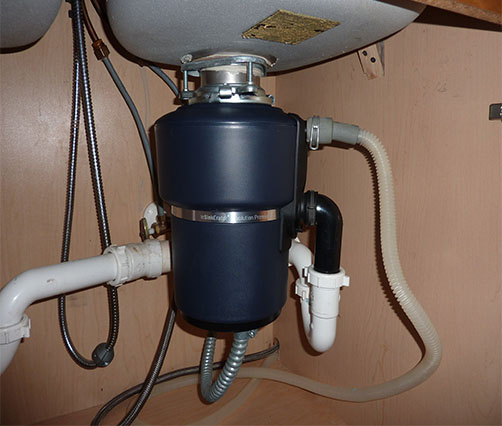
Whether you call it a garbage disposer or garbage disposal, we all want ours to work! Garbage disposer has come to a complete halt, Obinlinks Repair can help. We have shared some of the symptoms of troubleshooting your garbage disposer.


Garbage Disposer Parts, Accessories & Repair Help

Cause 1

Start Switch
The start switch might be shorted out. Use a multimeter to test the start switch for continuity. If the start switch has continuity all of the time, this indicates that the start switch is shorted out. If the start switch is shorted out, replace it.

Cause 1

Non Serviceable Motor
The disposer motor is not replaceable—if the disposer motor is defective or worn out, you must replace the entire disposer.

Cause 2

Shredding Plate
Check the shredding plate—if the plate wobbles or wiggles up and down, or if the shredding blades are stuck, replace the disposer.

Cause 1

Non Serviceable Motor
The disposer motor is not replaceable—if the disposer motor is defective or worn out, you must replace the entire disposer.

Cause 2

Wall Switch
If the garbage disposer plugs into a wall outlet, determine if the outlet is getting power. If the unit is not plugged into a wall outlet, use a multimeter to test the wall switch for continuity. In addition, check the home circuit breakers or fuses.

Cause 3

Start Switch
Some garbage disposer models have a stopper switch (or batchfeed stopper). The batchfeed stopper activates the start switch to start the disposer. If the start switch is defective, the disposer will not turn on. To determine if the start switch is defective, use a multimeter to test the start switch for continuity. If the start switch does not have continuity, replace it.

Cause 1

Splash Guard
The splash guard might be torn or damaged. If the splash guard is torn, replace it.

Cause 2

O-Ring
The O-ring might be torn or broken. If the O-ring is damaged, replace it.

Cause 3

Sink Flange Gasket
The sink flange gasket might be torn. If the flange gasket is torn, replace it. In addition, make sure that the sink flange is properly tightened.

Cause 1

Non Serviceable Motor
If water leaks from the bottom or side of the garbage disposer, this indicates that the motor seal is defective and water is seeping into the motor housing. The motor seal is not repairable—if the motor seal is at fault, you must replace the entire disposer.

Cause 1

Non Serviceable Motor
This indicates that the motor is defective or that the motor bearings are worn out. The disposer motor is not replaceable—if the disposer motor is defective or worn out, you must replace the entire disposer.

Cause 2

Plate is Jammed
The shredding plate might be jammed or worn out. Most disposers have an opening at the bottom of the housing. If the shredding plate is stuck, insert either a disposer wrench or a ¼ inch Allen wrench into the bottom of the disposer and wiggle the shredding plate back and forth until it moves freely. If the disposer does not have an opening at the bottom, insert a broom handle into the drain opening and try to wiggle the plate.

Cause 1

Non Serviceable Motor
Most disposers have an opening at the bottom of the housing. To free the motor, insert either a disposer wrench or a ¼ inch Allen wrench into the bottom of the disposer and wiggle the motor back and forth until it moves freely. If the disposer does not have an opening at the bottom, insert a broom handle into the drain opening and try to wiggle the motor. If the motor is not jammed, or the motor still hums after you free the plate, this indicates that the motor is defective. The disposer motor is not replaceable—if the disposer motor is defective or worn out, you must replace the entire disposer.

Cause 2

Shredding Plate
Most disposers have an opening on the bottom of the housing. If the grinding plate is jammed, insert an Allen wrench into this opening and turn the plate to clear the obstruction. If your disposer does not have an opening on the bottom, insert a broom handle through the top opening and wiggle the plate. If the motor still hums after you free the grinding plate, or if the plate won’t turn freely, replace the entire disposer.

Cause 3

Plate is Jammed
Most disposers have an opening at the bottom of the housing. If the shredding plate is stuck, insert either a disposer wrench or a ¼ inch Allen wrench into the bottom of the disposer and wiggle the shredding plate back and forth until it moves freely. If the disposer does not have an opening at the bottom, insert a broom handle into the drain opening and try to wiggle the plate. If the shredding plate is not stuck, or the disposer motor still hums after you free the plate, this indicates that the motor is defective. The motor is not repairable—if the motor is defective, you must replace it.

Cause 1

Batchfeed Stopper
If the garbage disposer stopper switch won’t turn on the disposer, the batchfeed stopper might be defective.

Cause 2

Wall Switch
The wall switch might be defective. Use a multimeter to test the wall switch for continuity.

Cause 3

Start Switch
Some garbage disposer models have a stopper switch (or batchfeed stopper). The batchfeed stopper activates the start switch to start the disposer. If the start switch is defective, the disposer will not turn on. To determine if the start switch is defective, use a multimeter to test the start switch for continuity. If the start switch does not have continuity, replace it.

Cause 1

Non Serviceable Motor
The motor bearings might be defective. Most disposers have an opening at the bottom of the housing. Insert either a disposer wrench or a ¼ inch Allen wrench into the bottom of the disposer and wiggle the shredding plate back and forth until it moves freely. If the disposer does not have an opening at the bottom, insert a broom handle into the drain opening and try to wiggle the plate. If the disposer motor still hums after you free the plate, this likely indicates that the motor bearings are defective. The disposer motor is not replaceable—if the disposer motor is defective or worn out, you must replace the entire disposer.

Cause 2

Shredding Plate
You can manually turn the grinding plate to free the plate. Most disposers have an opening on the bottom of the housing. Insert an Allen wrench into this opening and turn the plate to clear the obstruction. If your disposer does not have an opening on the bottom, insert a broom handle through the top opening and wiggle the plate.

Cause 3

Plate is Jammed
Insert either a disposer wrench or a ¼ inch Allen wrench into the bottom of the disposer and wiggle the shredding plate back and forth until it moves freely.